The ‘IR’ in the name stands for Infrared Radiation, a form of electromagnetic radiation that is not visible to the human eye but can be sensed as heat. An IR Sensor (Infrared Sensor) is a type of sensor that detects infrared radiation emitted by objects as heat.
The Infrared Obstacle Avoidance IR Sensor is widely used in robotics and automation applications to enable obstacle detection and navigation for robots or automated systems.
Table of Contents
Key Components
IR LED (Emitter): Emit infrared light as an invisible beam.
Photodiode (Receiver): Detect the reflected infrared light emitted by the IR LED.
Potentiometer: Adjust the sensor’s detection range. The effective distance range is 2cm to 30cm.
Operational Amplifier (Op-Amp): Amplify the received signal for processing.
Signal LED: The green indicator lights on the board when the module detects an obstacle.
Power LED: The LED lights up when the sensor is powered on.
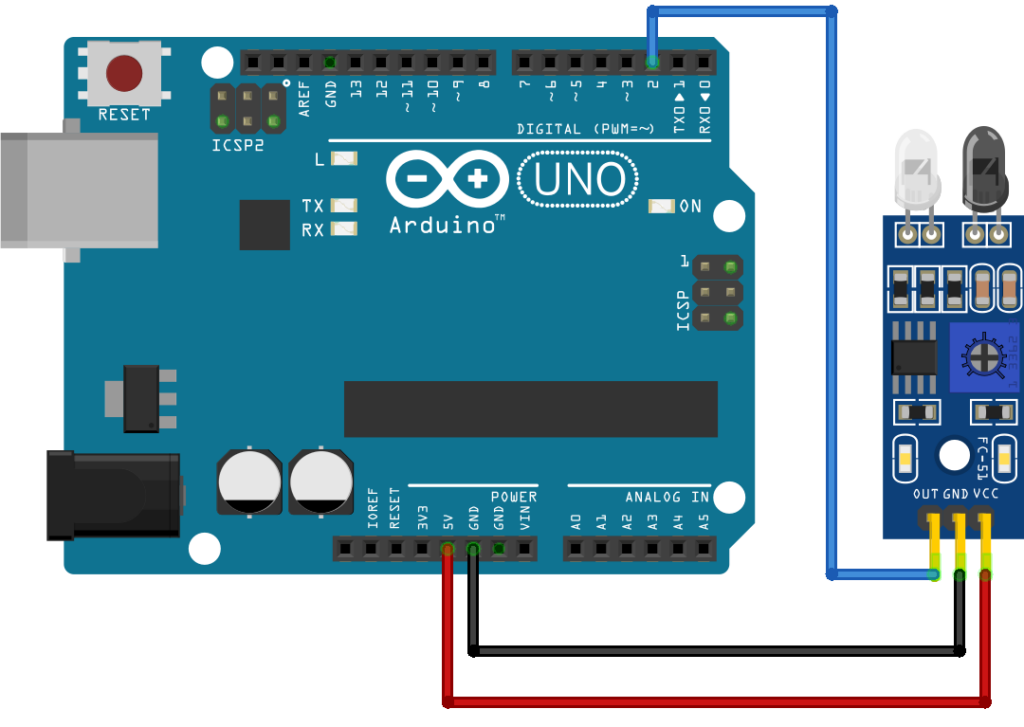
VCC: 3.3-5V DC power supply pin
GND: Ground pin
OUT: Digital Output pin (0 or 1)
How It Functions
IR sensors detect infrared radiation, either emitted by objects (passive) or reflected from them (active), to determine presence or distance. Here’s a more detailed explanation about how an active IR sensor works.
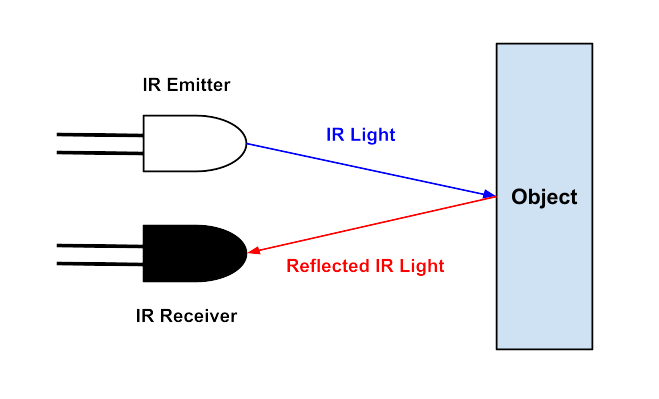
Emission of Infrared Light: The sensor emits infrared light through the IR LED. This light is directed towards the environment in front of the sensor.
Reflection of Light: When the infrared light hits an object, it gets reflected back toward the sensor.
Detection of Reflected Light: The receiver detects the reflected infrared light when an object is present.
Output Signal: This IR sensor is an ‘Active Low’ output sensor. ‘Active Low’ outputmeansthe sensor’s output is High (higher voltage level) when the receiver does not receive reflected infrared light and goes Low (0V level) when it does.
Advantages
Cost-effective: These sensors are typically inexpensive and easy to implement.
Non-contact: They allow for obstacle detection without physical interaction with the environment.
Compact size: The sensors are small, making them suitable for compact systems like robots or drones.
Lower power consumption: The battery used in infrared devices lasts for a long duration.
Soft object detection: Infrared devices can measure the distance to soft objects compared to ultrasound sensors because soft materials often don’t reflect ultrasonic waves well.
Disadvantages
Environmental interference: Dust, smoke, fog, haze, rain, and even strong sunlight can disrupt the IR beam, causing inaccurate readings.
Limited detection range: IR sensors generally have a shorter detection range compared to other sensor types, such as ultrasonic sensors.
Objects shouldn’t be black: Black objects typically absorb nearly all infrared radiation, resulting in a very weak reflected signal being returned to the sensor.
Require a clear line of sight: Any obstacles between the emitter and receiver will block the infrared signal.
Pin Wiring
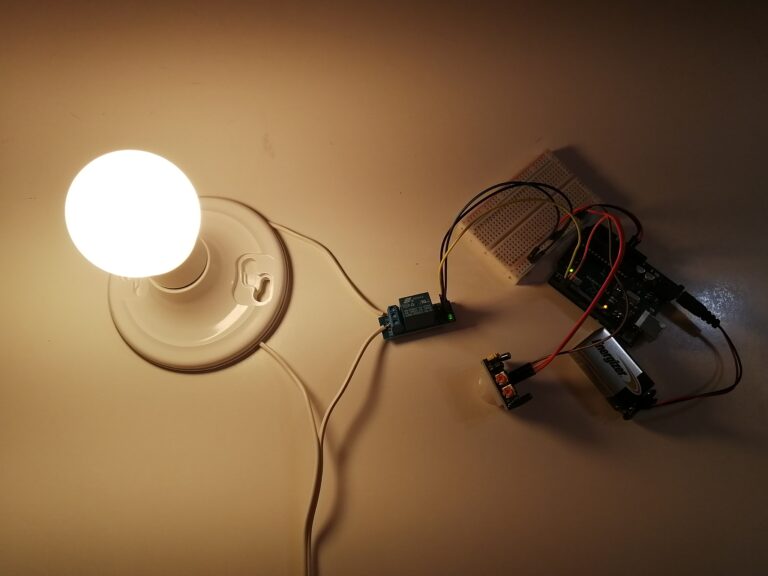
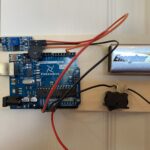
IR Sensors in Arduino Projects
IR sensors are widely used in Arduino projects for applications like obstacle detection, proximity sensing, line following, and remote control, due to their ease of use and versatility.
Arduino is an open-source, easy-to-use platform for building electronic projects, consisting of both a programmable circuit board (microcontroller) and a software (IDE) for writing and uploading code to the board.